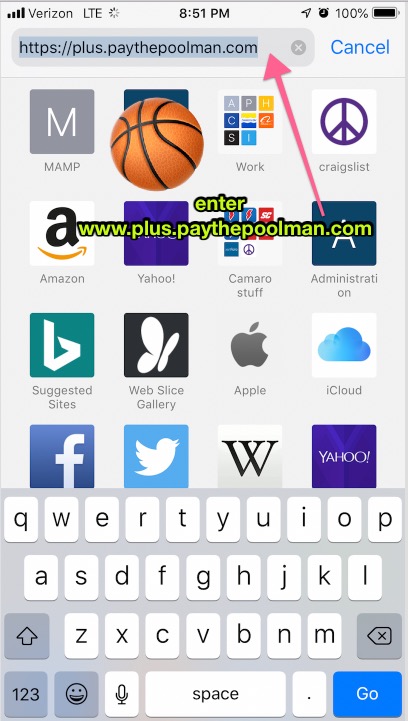
- Turn on your device and open up your web browser.
- Type into the web browser www.plus.paythepoolman.com
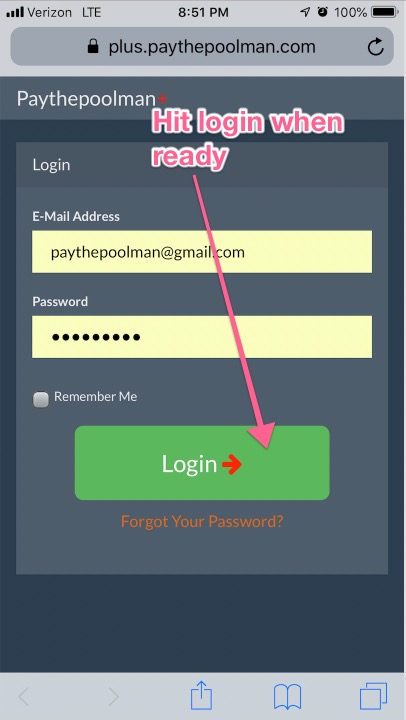
- Now you will enter your login credentials and click the green login button
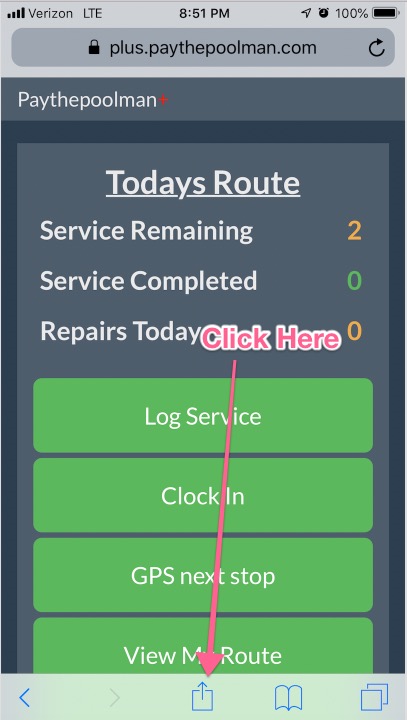
- Once logged in you can click on the share/menu button
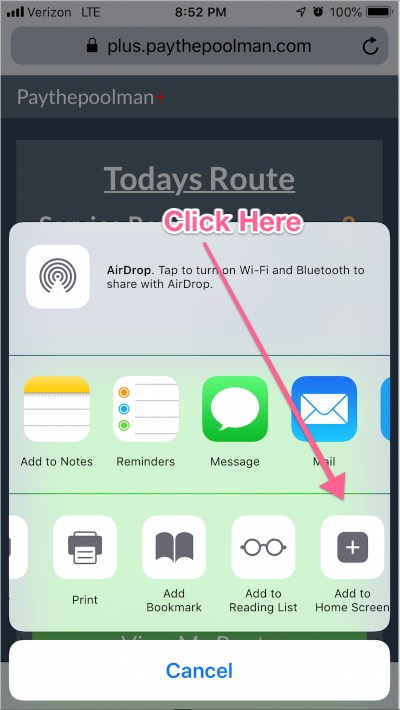
- Then select the add to homepage button
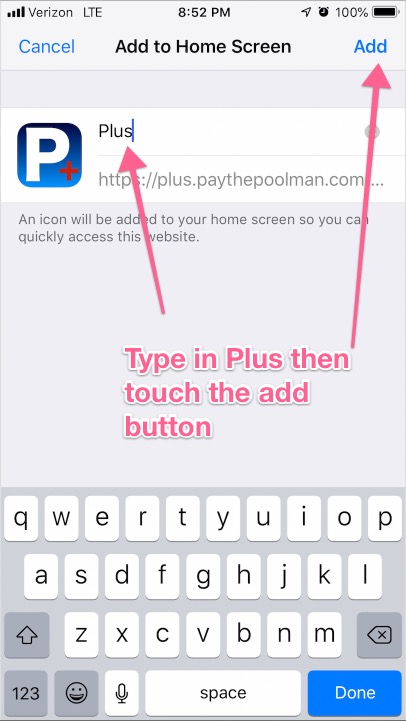
- And enter the word Plus then click add to the description
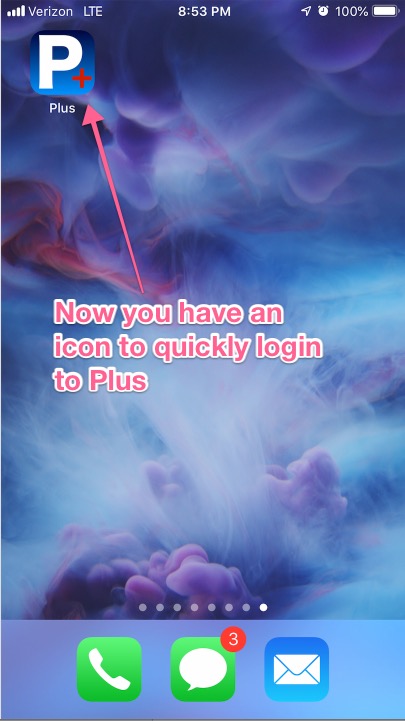
- And now you have an icon
Category: Uncategorized
How to reset your password in Paythepoolman
To reset your password in Paythepoolman, please follow these steps.
- On your device go to https://www.paythepoolman.com/login
- There will be a link right below the green Sign in button. Click on the “Need help?” link.

- Type in your full Username and Email Address, then click the green SUBMIT button.

- Once you’ve clicked submit, you should have an email in your inbox. Go to your email and click the link provided.

- Copy your password and go to the link provided to login to your account.

- Type in your Username and paste your password into the password section. Then press the button Login.

- Go to “settings” in the navigation bar at the top of your screen.

- Click on User Settings.

- Type in your temporary password in the “Password:” box. Then type in the password you’d like to be able to change it to in the “New Pass:” and “Confirm Pass” boxes. When you’re done, click on the Update button.

- You’ll see a message saying, “Account password updated”. Now you’ve reset your password to a password you know!

How to add a new customer (Updated) in Paythepoolman
We will be going over how to add a customer on Paythepoolman. First you go to your menu bar where it will have “+ customer”. Once we click this it will take us to a page where we have all our contact information on the left and the service and mailing address on the right.

Before filling out there information you want to make sure the customer is okay with receiving text messages. So we will go ahead and fill out the information. The bottom right column has a section for gate and lock codes which of course comes in handy.

If you are just adding the customer for a one time service you will just go ahead and click “add new customer”. Most of the time we will be adding them to our auto billing. So first we will go ahead and turn on the auto billing. So you would go ahead and type in what type of service you will be billing for (normally pool service). Then select whatever price and description you want. We can then choose to go ahead and email the invoices and add then save the customer.

It will then save that customer and take us to their page.

If you do not find the correct item under item to bill for you can go to the more button and select “income items” and add whatever item you want with whatever description you would like.


Thanks so much.
Easily search for customers while routing in Paythepoolman Plus
We will be using our plus program to see how easy it is to search while routing. While on the plus dashboard you will go ahead and go to routing and select service routing. We then select our employee and say we are going to schedule their Monday.

Well now we have added in a search bar. So instead of scrolling through your entire list of customers you type their name or company name into the search bar and they will pop up.

This search bar is efficient, convenient, and made to save you a lot of time. Thanks so much have a great day
How to print your employees route in Paythepoolman Plus
We are going to walk through how to print out an employee’s route in case they would like to keep in their truck or you would like to reference it. In order to start we have to first access our plus dashboard. We then go to routing and service routing. And then we go ahead and select an employee.

We can see we only have one orange customer meaning we only have one routed. We can go ahead and view any date and it is always going to give us the option to print our employee’s route.

When we open this up we can see our company name, who the route sheet is for, and the company logo. It also lists off what pools this employees has on certain days and what days they do not have pools scheduled.

Though this is an online system that can be viewed at any time we have had customer requests for a printable option for quick references. So we went ahead and did that for them and their convenience. Thank you for reading and have a great day.